Tuesday, April 17, 2012

Interface Modification.

Amnesia: The Dark Descent

*Note that all images save my mockup are taken from the game Amnesia: The Dark Descent. I assume no ownership over original images.


Much of the interface in Amnesia: The Dark Descent, is very organic. There is a small aiming reticule in the center of the screen, but it’s only just visible to give the player a guideline for where their cursor is currently pointing. The cursor changes images depending on whether the player is hi-lighting an object that can be picked up or interacted with.


The two attributes the player needs to keep track of in the game are the player’s Sanity and Health. Health is self-explanatory; if it depletes all of the way, the player will die. Sanity is a measure of how stable the player is. Depletions in Sanity make navigation more difficult as the screen will blur and shift more. It can also make avoiding monsters more difficult as the player is more likely to give himself away if his sanity deteriorates to dangerous levels. Depletions in health are indicated by impact markings on the screen whereas depletions in sanity are indicated by an effect that makes it look as though the screen is swaying from side to side while the sound of teeth grinding together plays in the background.


The problem with Amnesia’s interface, in my opinion, lies in how the inventory operates. The inventory is standard fair for anyone who’s ever played a video game, but that’s the problem; Amnesia is meant to be more of an experience and less of a game. With a game where most of the feedback is so organic and integrated into the game, without needing to take a break, a paused menu takes away from the experience. To be fair, the interface fits will with the visual aesthetic of the game. The fonts used and flourishes in the design are indicative of the medieval and Lovecraft-ian atmosphere of the castle the player has to navigate. The design almost appears bone-like. Likewise, the design of the icons in the inventory displaying what the player is carrying follow the game’s overall visual aesthetic. It’s this paused-screen layout that I take issue with.


What I would propose for a change would be something along the lines of the layout of Dead Space, where inventory screens are in real time and, for the most part, take place from a first person perspective. Instead of going over to another menu, perhaps pressing the TAB key causes the player to look down at the satchel he is carrying. A brief animation would show the player glancing down and opening their bag. Because it would be difficult to model out all of the specific pieces the player might be carrying, there would need to be a bit of a cheat in that a fade-in menu would display while looking at the inventory.


(From game, not a mockup by me)


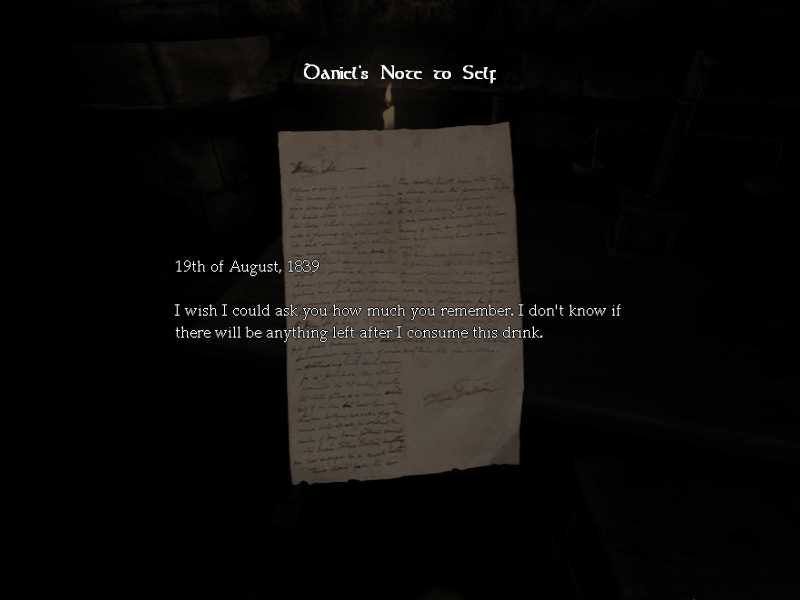
Notes and journals would be accessible through clicking on the journal within the bag, which would be visible at all times. Doing this would pause the game and cause the standard journal menu to appear. Though this does drop away some emersion, I feel it’s an allowable break. The journal entries are often accompanied by a voiceover and background noise could make listening to this voiceover difficult if everything took place directly in real time. Bioshock did use a similar method, playing found info tapes in real time, but a key problem I found with this is that dialog would be lost by enemies attacking and background noise unless the player just stood still in one place.

Health and sanity displays are a bit trickier. I would say that damage and decreased sanity could be indicated by the player’s hands as they look at the bag. Mousing-over the hands could display the same kind of tool-tip that displays when the player mouses over the brain and heart icons in the old menu setup for a clearer indication of how hurt the player is.

All other parts of the interface I would leave alone. I had briefly thought of suggesting the inclusion of an animation of the player picking up found notes, but again there is the problem of the voiceover that plays when most notes are found.

(Once more, from game, not me)


Tuesday, April 10, 2012

Left 4 Dead 2 interface design

All screen shots in this post are from Left 4 Dead 2, created by Valve Software. I assume no ownership over original images.
***


While the game play in Left 4 Dead 2 is by no means simple, the interface for the game is somewhat minimalist. At any given time, the player can discern their health, the health of their team mates and the items they currently have equipped.

The player’s health appears in the bottom right corner of the screen. The more damage the player takes, the more the bar depletes. Direction damage is coming from is indicated by red arrows which appear on the screen if the player is being attacked from behind or a direction they are not currently facing. In addition, the health bar will change colors to reflect the amount of damage the player has taken and how close they are to being knocked over or killed. Green means good condition, yellow is slightly worse though not yet critical and red means dangerous condition. In addition to the visual representation, a character tends to move slower when his or her health is in the red. If the player uses a med pack, an item that permanently refills health, then the bar replenishes normally and remains solid. However, if the player uses items such as the pain pills or adrenaline shots, the bar will fill transparently. The color tends to change to either green or yellow, but the bar will gradually deplete over time. This coupled with the transparent filling signal the player that the health boost is only temporary. These same rules apply to the player’s squad mates’ health at any given time, though these health indicators are a tiny bit smaller on the display than the player’s. Also, some of the equipment the other players currently have is displayed over their health bars. If a player reaches critical conditions, where being knocked down again means death, the color on their layout will de-saturate and, depending on how close to death they are, a heart beat sound effect will play. Conversely, when the player is under the influence of adrenaline, the sound will mute and the edges of the display will blur to reflect the slightly dazed, super-powered state the player is now temporarily in.

To the left side of the screen is a display showing what the player has equipped along with empty item slots. On the PC version, they are layered vertically corresponding to the order they will be equipped while using the mouse wheel to select an item. On the XBOX, they are set out in a pattern that represents the hotkey layout on the directional pad. All of the item slots have a default icon indicating what might be equipped there, save the primary weapons slot which is entirely invisible until the player picks up one of the primary weapons, such as the shotgun or the sub-machine gun. In addition, weapons that function off of ammunition will have numbers next to their icons indicating how much ammunition the player has.


Much of the rest of in-game feedback comes organically, in the way that enemies deform when shot, rather than having health meters, from the game’s music, which gives cues based on which boss-type enemies are nearby and if a hoard is about to rush the party’s current position, or in the form of tool-tips or quick overlays. Regarding the lattermost, if a player is knocked down, a tool tip will appear on the screen notifying the player that a team mate has been knocked down and needs help. In addition to this, the player’s model will gain a yellow outline visible through walls so that other players can find their way to them. At other moments in the game, certain objectives will appear in the form of tool tips for the player, such as instructions to hold a position until rescue arrives or press a button to move forward. In addition to these tool tips, the characters will often have dialog that reflects the current objective, such as signifying which way to go or what item to interact with. Furthermore, times players have “saved” one another (prevented another player from taking damage by killing an attacking enemy before they could hit) or killed special infected are noted at the right of the screen.

The interface aesthetics for L4D2 is, again, a bit of a mixed bag. On the one hand, much of the information the player needs to know is told organically, adding to the immersion of the game and the feel of being in a survival situation. The player avatars, health bars and menu screens all have a gritty, film-grain look to them which in turns adds to the game’s atmosphere as well as hearkens back to old school horror films. Certain elements, though, such as tool-tips, some sound effects used while navigating menus or notifying players and glowing hi-lights around the characters or items can draw attention to the fact that the entire experience is taking place in a video game. The flip-side is that all of these cues make it much easier for the player to notice what is going on in the chaos while still forcing the player to pay attention by not doing all of the player’s work for him. What’s more, there is a game setting for the game that, while it doesn’t disable the computer game-ish sound effects, does disable tool tips and the glow around items and characters in order to make the experience more challenging and emphasize player to player communication.


The Elder Scrolls V: Skyrim interface

All screen shots are taken from the game The Elder Scrolls V: Skyrim, which was created by Bethesda. I assume no ownership over original images.

***

The readout for Skyrim appears very stream-lined. Heath, Magic and Fatigue bars all appear on the bottom of the screen during normal game play. These bars will fade from view typically while the attributes they indicate are not being affected, presumably to allow the scenery to dominate most of the screen. Equipped weapons are displayed in the player’s hands while in first person view and drawn and on the player’s back and person when in third person view. Spells are only displayed when the player has “drawn” them.

Within combat, an enemy’s health will be displayed in a read out above it, along with the enemy’s name. Both enemy and player health give feedback on damage by the bars depleting, typically with some kind of accompanying sound effect either in the way of an impact noise or a creature/humanoid grunt.

There is no mini-map but rather a compass located at the top of the screen. The compass is also minimal in design, not so much showing surrounding scenery as much as indicating nearby known/discovered locations, enemies and the current direction the player is facing. The compass also serves the dual role of indicating if the player can use his shout ability; when a player uses a shout, the compass will glow blue and gradually stop glowing from the center until it returns to normal, at which time it’s possible for the player to use the shout once again.


The game has a unique menu that separates the map, items, magic and skills into four separate sub-menus. If the player presses the tab key on the PC, a compass-style menu is brought up. Pressing the WSAD keys or mousing-over a compass point and clicking brings up the corresponding menu. 


Within the Magic and Items menus, the corresponding items are sorted into categories, such as books or keys for items or destruction and illusion for magic. Both menus also have a catch all category which lists everything on the player’s person relating to either items or magic


The skills sub-menu is a constellation map wherein each constellation represents a skill tree for the player. As the player levels up, the player is allowed to light on of the stars in one of the constellations, adding to their current skills with perks. 


The map menu displays a bird’s-eye view map of Skyrim, complete with small icons displaying discovered locations in white and known but undiscovered locations in black with a white outline. Quest icons  appear in the shape of an arrowhead as do custom player icons, though the latter are cobalt in color instead of white. 


This is all, of course, without taking into account the sub menus for potion creation, blacksmithing, equipment modification, lock picking, conversation, shopping, looting, cooking, and enchanting. In a nutshell, menus such as those for creating or purchasing items have a readout similar to the item menu, with a row of available categories situated in a panel on the left hand of the screen. Each category folds out into a drop-down menu that lists available items (for shops or looting) or possibilities for creation (for any crafting sub menu – potion making, blacksmithing, etc). Typically, hi-lighting one of the items will display what is needed for it, whether it’s materials or coinage. 


Lock picking, on the other hand, is a mini-game in which the player must use the mouse or controller to rotate a lock pick around a lock and, using contextual clues in the form of how far the lock turns and what noises the lock makes, figure out how best to position the lock pick to open the lock.

The interface as a whole is a strange mix of dynamics. On the one hand, icons for locations, sound effects played when scrolling through the menus and the font appear to all fit with the fantasy and Nordic themes of the game. The smooth layout, though, can at times feel very high-tech.


Assassin's Creed II interface

All screenshots are taken from the game Assassin's Creed II, which was developed by Ubisoft. I assume no ownership over original images.

***


The main unique feature of the interface in the Assassin’s Creed series is that the control buttons are mapped to corresponding body parts. At all times in the game, except for when the game is in a shop window or menu screen, the HUD displays a game pad map in the upper left corner. The XBOX controller button colors are displayed but with hand, weapon, foot and head icons in place of the A, B, X, and Y symbols. Next to each of these buttons is a small text explaining what pressing the button will do. If the “high profile” button is pressed, the actions will change into high profile actions. For example, the bottom most button, the one which controls the character’s feet, will make the character run by default. When the high profile button is pressed, the button will make the character sprint. Depending on if the character is in combat or climbing, the context for these buttons will further change. Each time, though, the corresponding action will appear in a single-word description beside the button in the HUD.
The player’s health is displayed in the top left, along with a small, stylized avatar resembling Ezio, the protagonist, while he is dressed in his assassin clothes. The health is represented by a series of diamond pips that will go from filled with white to an empty black when the player takes damage. There is also feedback in the form of controller vibration when this happens. One of the game play elements is that the player’s armor, which is what the player purchases to increase his health, can be damaged. If armor is damaged to the point of not being able to protect the player, corresponding pips on the life bar will partially deplete, notifying the player to get the armor repaired. Typically, this will be accompanied by a tool tip instructing the player to go to a blacksmith for the repair. The avatar of Ezio represents the character’s infamy. As the player does illegal actions, such as pick pocketing or assassinations, and, most importantly, if they are witnessed doing so, the infamy level rises. With no infamy, the avatar appears completely white. The more it grows, however, the more a red ring fills in around the avatar. If the player becomes infamous, meaning the guards will give chase when they spot the player, then the avatar fills entirely red and is replaced with the Assassin’s symbol.
Navigation is helped via a mini-map appearing in the lower right corner. The map gives an bird’s-eye view architectural schematic of the surrounding areas. Within this map, icons show the location of points of interest, such as shops or, if the location has been found, treasures. Mission targets are also displayed on the mini-map. If the player is on a mission or if the player has set a custom marker, the icon will hover on the edges of the map if the target is out of range in order to help guide the player. When there is one target, a numerical value next to the map indicates how far away the player is from the goal. In situations where there are multiple targets, it seems this value indicates how near the player is to the closest target.
The lower left of the screen displays what weapon is equipped along with how much money Ezio has.


If the player presses the weapon menu button, the game will pause and a weapon wheel will appear on the screen. Using the control pad or mouse, the player points in the direction of the desired weapon to select it. When highlighted, a weapon specific sound effect will play, further indicating the weapon to be selected.

The remaining key menu is a larger version of the mini-map. The same rules that govern the mini map apply to the larger map.
Not exactly a menu but a form of game feedback, the villa in Assassin’s Creed II serves as a home base for Ezio. In addition to possessing a mini game that can allow the player to grow the villa, and with it his income, the villa houses a mansion that displays player progress in the form of armor sets, weapons, collected art, codex pages and assassinated targets.
Since the game is set in Renaissance Italy, the style of the interface might seem to run counter to the theme. However, one of the major elements of the game is that the sequences involving Ezio are the genetic memories of Desmond, the other principle protagonist, who accesses these using the Animus, a complex, futuristic machine that places the user in a virtual environment to live out genetic memories. Because of this, the interface has more of a futuristic theme. This theme is further backed by the glowing outlines goals and important people tend to have and the strange, digital camera flickers that happen at certain moments in the game, from when the player enters and exits a cutscene to when the player is low on health.

Mass Effect 2 interface

All screenshots are taken from Mass Effect 2, created by Bioware and distributed by EA Games. I assume no ownership over original images. Note that in some cases pictures of menus may have been omitted and I may have left some menus out. As an RPG, Mass Effect 2 has many contextual menus and my primary goal was to cover the most common.
***

Depending on where the player is in the game, the HUD will appear different. If the player is on their ship, then HUD elements will be minimal, icons only appearing to show a player that an item can be interacted with and then telling the player the given interaction.

While in a world hub, the player’s HUD will show his two squad mates down in the center of the screen. At any point in time, it is possible to bring up the map, which shows current location, or the journal, which shows objectives and progress. Both of these are accessible via the pause menu (a hub that can also be used to access the save game, load game or level up windows) as well as hotkeys.

At any point in time when Shepard is outside of his ship, whether in a world hub or an area where combat is possible, the player’s equipped weapons will be visible on the character’s back. In addition, any chosen armor pieces for both Shepard and his squad are visible on the corresponding characters.


In combat, the camera pulls tighter to Shepard’s shoulder. A crosshair, different depending on which weapon is selected, will appear, indicating where the player is aiming. The crosshair will grow or shirk depending on how accurate the weapon is currently and whether or not the player has entered into the more accurate aiming mode. For sniper rifles, the camera switches to the first person and the crosshair is the weapon’s scope.  Damage feedback on the part of the player is demonstrated via a decrease in the health bars above enemies (more in depth on this later). Damage to the player is indicated via camera shake, grunts from the character and a decrease in the circular health bar at the bottom of the screen. If the player’s health drops to dangerous levels, the edges of the screen will fill with a red-veined texture and the sounds treble will increase while a heartbeat sound plays, giving the illusion that the player’s heart is thudding in their ears. At certain moments, in game text will prompt the player with suggestions or directions, such as reminding them to take cover to replenish health when the character’s health is critical or using a power to revive squad mates when a squad member is down. A mini-map is displayed in the bottom right corner which, as long as it isn’t being jammed by an enemy or the environment, displays the location of hostiles.


During combat, the player can enter into menu wherein they can access their powers and direct their squad. This menu freezes play temporarily while the player inputs commands via buttons that indicate what powers and weapons are available to the player as well as the player’s squad. Powers and weapons can also be hot keyed for fast access without taking the player out of the action. The advantage of this menu, though, is that it pauses the action, allowing the player to plot out their next move. A clearer readout of squad mate’s condition is available from this menu as well.
Outside of combat, other game specific actions have their own interfaces and readouts. Both the hacking and bypass mini games have an interface that displays the instructions for the game as well as letting the player know their progress and time still allotted to them to complete the objective.


The dialog window appears as a six-point wheel, with short blurbs representing what the player can say next. Options to advance the dialog are typically grouped on the right side and options to further interrogate characters on the situation are typically grouped on the left. In addition, the vertical placement of a dialog blurb indicates the character’s attitude while saying it; The topmost point indicates a friendly or Paragon attitude, the middle a neutral and the bottom most an aggressive or Renegade attitude. There are exceptions to these placement rules, particularly during junctures of the game where the player must choose between two significant options. In addition to this, there may also be blue Paragon dialog options (in the previous game known as “persuade”) and red Renegade dialog options (in the previous game known as “coerce”). These options appear on the left side of the wheel and indicate that a difficult to navigate conversation can be bypassed via one of these options because the Paragon/Renegade score meets the needed requirements.


The Level Up screen displays the abilities the player can level up for a given character, the points they have to spend and, if Shepard is currently selected, the current Paragon/Renegade score. Each skill has four levels and requires increasing numbers of points to advance (level 1 needs 1 point, level 2, 2 points, etc.). Hi-lighting a skill and a level reveals a short blurb on what the skill does followed by stats on that specific skill.

The entire design for the interfaces in this game is universally futuristic and high-tech looking, with an overall orange color scheme. It meshes well with the game’s overall style and tone.

Minecraft Interface

All screenshots are taken from the game Minecraft, created by Mojang. I assume no ownership over original images.


At all times, there is the health bar, the hunger bar, the armor bar and the experience bar.

The health bar tells the player how close he/she is to death. Feedback on damage is indicated both with reductions to the hearts displayed in the health bar as well as a sharp sound effect when the player takes damage. The only exception to this sound effect playing seems to be if the player takes explosive damage, in which case an explosion sound is clearly heard. The health bar will begin to shake when the player’s health reaches a critical level. If the player’s hunger bar is at full capacity, the player’s health will regenerate, causing it to flash as the hearts refill. The same happens if the player’s health is replenished by a potion or some other method.
The armor bar is an indication of how well armored the player is. When equipped, armor will take damage in place of the player. If armor has too much stress inflicted upon it, it will break. This, however, will not result in harming the player, though the armor bar does deplete depending on how much stress the player’s armor has taken. The kind of armor and the amount equipped also affect how much the armor bar fills.

The hunger bar is a recent addition and factors into health. This bar is made up of tiny drumstick icons that diminish over time. The bar and icons appear to flash when it depletes. Unlike the health bar, the hunger bar only seems to be dependant on time in when it depletes. It’s more difficult to notice until it empties all of the way, which causes the player to loose health. When a player looses health due to starving, the damage sound effect plays. The hunger bar does begin to move around much like the health bar when it gets low.
The experience bar is an indication of how many experience orbs the player has collected. The bar will gradually fill a green color and will empty when it gets full. When this happens, however, the numeric value above the bar will increase in number. This tells the player how many experience points they have to later spend on enchantment.
Just bellow the health, hunger and experience readouts is an inventory bar. Items equipped to the player’s hand will be hi-lighted by a white box. Items that are in stacks will have their number listed bellow, unless they’re singular in which case there will be no value shown. Mousing over an object displays a tool tip balloon with the object’s name. Tools wear out over time, so they have an indicator bar bellow their icons as to how much more stress they can take. As the tool takes more stress, not only does the smaller bar beneath it decrease in size, but the color of the bar shifts from green to a more muddy color, finally to a red. When a tool is depleted, particle effects play and a break sound effect is heard.

Player ailments or effects are shown in two places. First, they are indicated in the inventory screen with a specific icon just to the left of the screen. When moused-over, they display the name for the ailment or effect. Each ailment/effect also lists the time of effect directly below it. Second, they are indicated to the player through particle effects that will swirl in front of the player’s view and around their in game avatar.

The inventory screen is pulled up by pressing the “I” key. The player can see everything he is carrying along with a display of his avatar wearing any armor they might have equipped or carrying any tools they might have equipped. The armor slots are to the left of the character, in line with the parts of the body the armor equips to. Opposite the character portrait is a crafting window with four slots. This allows the player to craft simple items. If the combination in the window matches an actual item, an indication of the item to be crafted will appear, allowing the player to click on it to create it.


Crafting items or chests will have their own specific layout as well, but will only appear when clicked. Chests have a readout similar to the player’s inventory. The size of the chest determines the available spaces for item storage. Crafting tables have a window that has a larger crafting box than what the player has in the inventory screen, allowing the player to make more complex items. The readout is the same, with an item appearing in the craft box if the combination corresponds with a recipe. Ovens/furnaces have three boxes; one for the item to be cooked, one for the fuel and one for the result. There is a flame icon in between the item to be cooked and the fuel which will light up if both boxes are filled with a cook-able item and proper fuel respectively. The icon diminishes over time, demonstrating how much of the fuel has been used as well as how quick certain fuel burns (for example, with wood as fuel, the icon will diminish quicker than with coal as fuel). Enchanting tables have a slot to place the tool and a read-out to the right of the window indicating how many experience points an enchantment requires. The larger the number, the better the enchantment. For whatever reason, the readout does not indicate the given enchantment in a readable language, instead using decorative runes so that the player doesn’t know what enchantment they’re getting. If a tool is enchanted, it will glow and give the name of its enchantment in the tool tip when moused-over.

Each and every one of the game windows is very reminiscent of old-school video games. The font and textures are lo-res (much like the rest of the game) and also emit a primitive vibe, befitting of the mostly lo-tech and fantasy atmosphere of the game.


Purpose of this blog

The purpose of this blog is to help neatly present my work for my Interface Design class. Rather than having to tote around a pile of papers, I decided that it might be better instead to create a blog to post the pictures and observations I will be making for the class.